
NOTE: The definitive reference for parts and prices is CtrlMtr01_BOM.xlsx in the EZ430\USB\Work\Control\Brd\ folder. All prices were taken from Digikey on or around April 4 2016.
UPDATE 20160524: CtrlMtr01_BOM.xlsx has evolved into AutoBOM. I create new entries in the AutoBOM Parts and Inventory tables as I research the big ticket components for the design. There is no harm in creating entries in the Inventory for items that are eventually removed from the design, they simply won't appear in the final BOM.
Not including the various caps and resistors, the big ticket items will be:
The parts cost for building 5 boards:
$376.51
The parts cost for building 100 boards (not including caps, resistors, leds, and headers):
$3080.15
The "at cost" price per board would be $31.
Omitting the ezFET circuit, replacing it with a direct connection to the JTAG pins on the MSP430, reduces the cost by about $7 per board (in batches of 100), or about 25%. Without it the end user needs to have and use a USB/JTAG programmer and JTAG connector to change the MSP430 firmware, making it much less convenient. I think the ability to easily reprogram the MSP430 will be a very attractive feature of the board and worth the extra cost.
There is a much cheaper version of the 32KHz crystal in a "cylindrical surface mount" package (Digikey 535-12051-1-ND). The cost is 5 for $2.05, 100 for $27.30. I noticed this in the "also interested in" links on the MSP430F5529 page. This is the part that is actually used on my LaunchPad board.
I did some research on Digikey for led pricing: LED Parts
This board relies on two external power supplies: 5VDC for the control electronics (derived from the USB connection) and an external 6-12VDC/6A supply for the motors. It would be nice if the board had a single 12VDC input to drive everything. The external power supply could then be either a 12VDC battery or AC/DC power brick.
The motor drivers can handle anything from 4.75VDC to 30VDC, so the 12VDC supply can be fed directly to the A3967's without any additional circuit. If I assume the board will always be connected to a USB hub then I can rely on that for logic power and feed the 12VDC power directly (and only) to the motor drivers. No additional power circuit required.
However, I will need a DC/DC converter if I want the board to run autonomously using only the 12VDC supply. The logic circuits require either 5VDC if I am pulling the logic power from the USB circuit, or 3.3V if I am driving it directly. This requires a DC/DC converter for the logic circuit to step down from 12V to 5V or 3.3V. I found a SparkFun DC/DC Converter that I could use as a reference. It is dead-simple, basically a single IC with a few caps and resistors. The IC is the Lineage Power 12V Pico TLynx. I looked the part up on Digikey and apparently Lineage Power is now GE Critical Power. The Digikey VendorID is 555-1127-1-ND. It is a bit pricey at $10.84 each, $924.38 for 100. The 2A version (Digikey 555-1160-1-ND is much cheaper at $4.31 each, $383.52 for 100. The price jumps for the 3A version (Digikey 555-1126-1-ND) to $7.01 each, $623.42 for 100.
I need to add some sort of power connector for the 12V supply, either a screw-down terminal for bare wires or a barrel jack. The barrel jack makes sense only if I am also providing the AC/DC converter, otherwise it becomes an inevitable pain for the end user to find the right connectors. It is also a nuisance when connecting a battery. A 2-wire terminal block (Digikey 281-1435-ND) is $1.05 each, $84.00 for 100.
I will need a simple switch on the board to control whether the logic circuit is driven by the 12V supply or the USB hub. This could be just a 2-pin post header and jumper.
Assuming I go with the 2A version, adding the power converter bumps the cost of the first 5 boards by about $27, and 100 boards by $470. This brings the "at cost" price to $35.00
April 27 2016
FAST FORWARD:
The layout has been completed. Today's task is to update the BOM before starting to procure the parts.
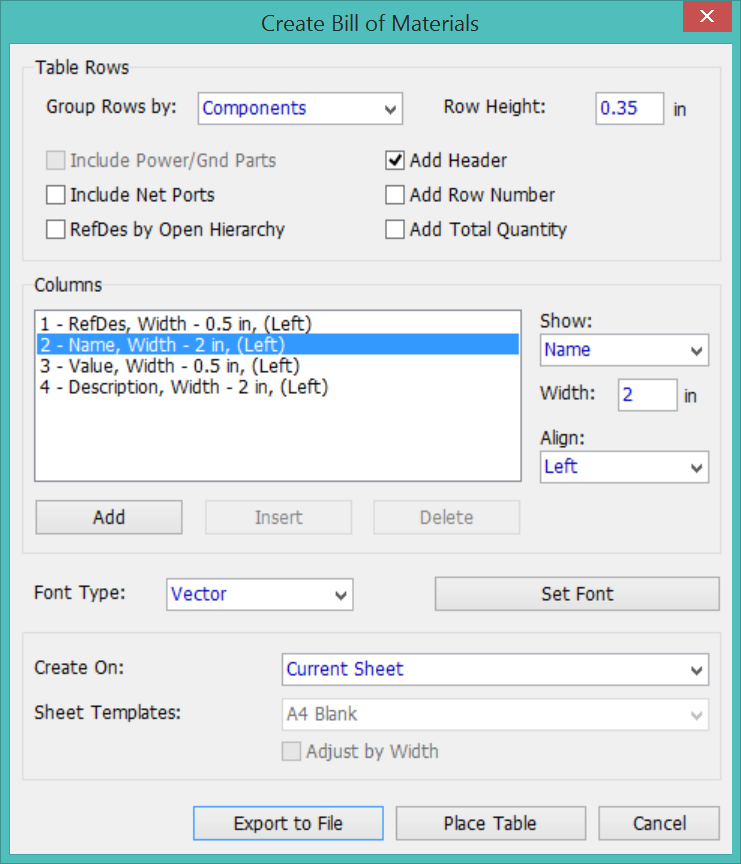
I start with the component list in schematic design manager, which gives me a table containing every component on the board. I need to make sure that every component in the schematic has a row in the BOM Parts list, and that every Part in the BOM has a matching row in the BOM list.
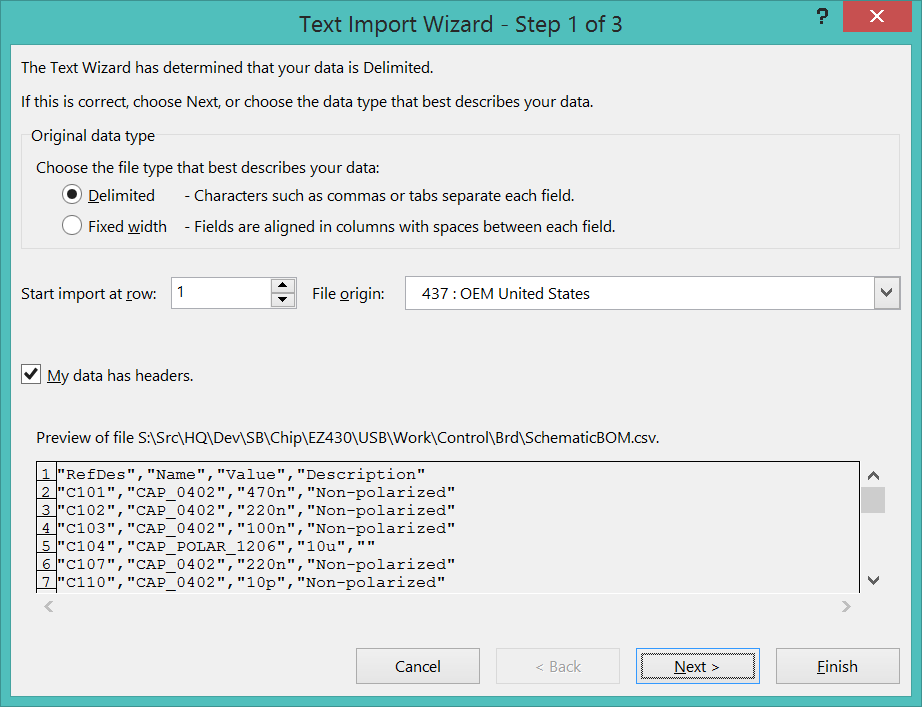
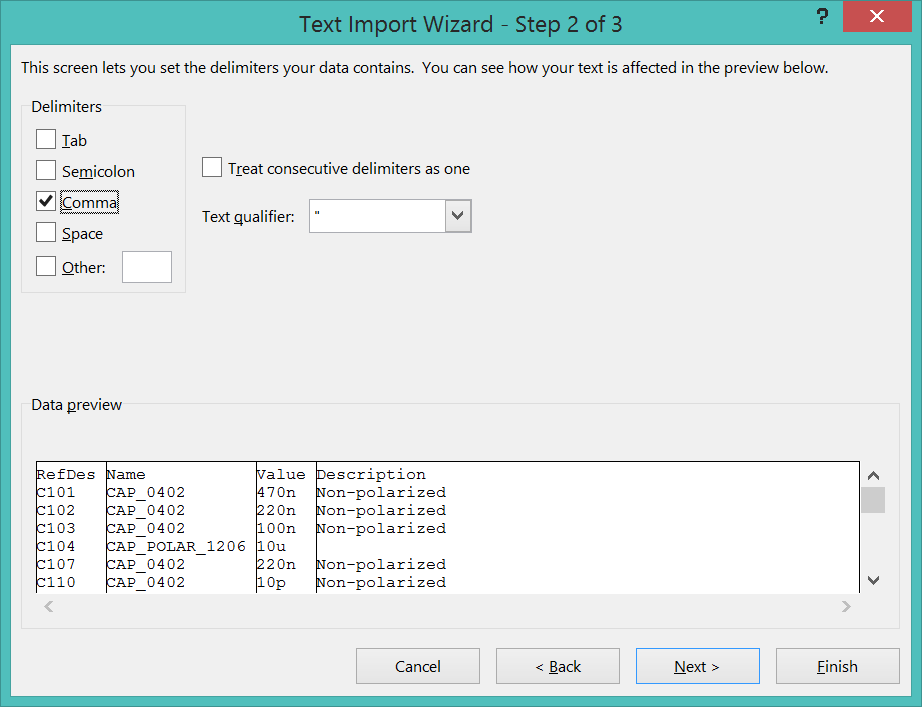
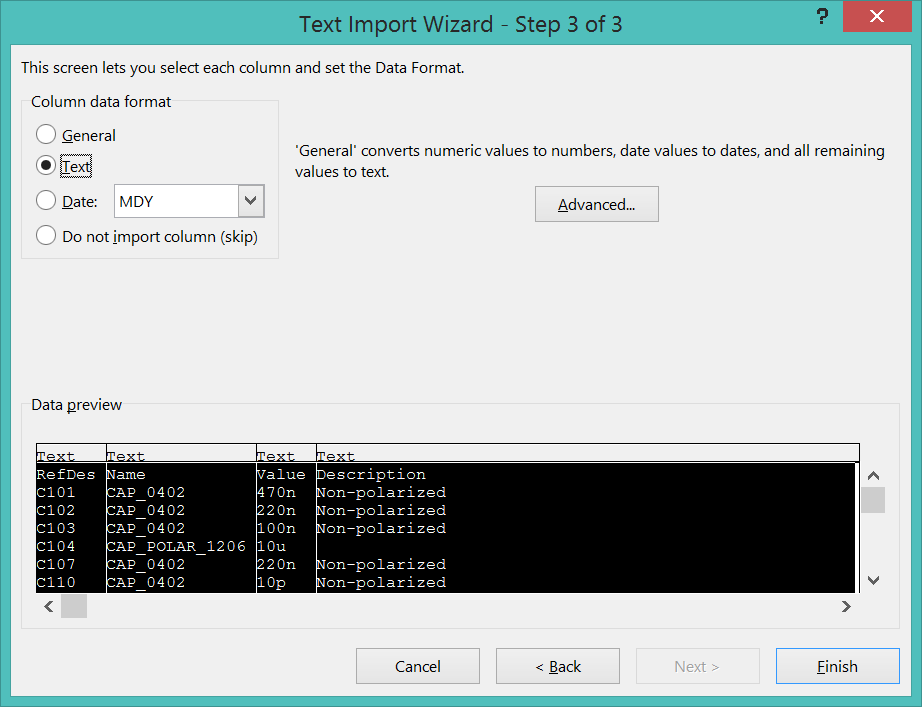
I export the BOM from DipTrace Schematic using Menu > Objects > Bill of Materials... and "Export to File". DipTrace does not handle placing the BOM into the schematic sheets very well. It creates a single monolithic table that has no hope of ever possibly fitting into a single page, it is much better to export the BOM to Excel. I import the BOM into my Excel BOM as a new sheet to make it easy to compare: Menu > Data > Get External Data > From Text. Set the format for every column to "text". I create a new window for each sheet (BOM, Parts, and Schematic) arrange them side by side, sort the Parts list by RefDes and start reviewing. Turn of the column/row headings for the BOM sheet (View > Show > [ ] Headings) to avoid confusing the row number and PartID.
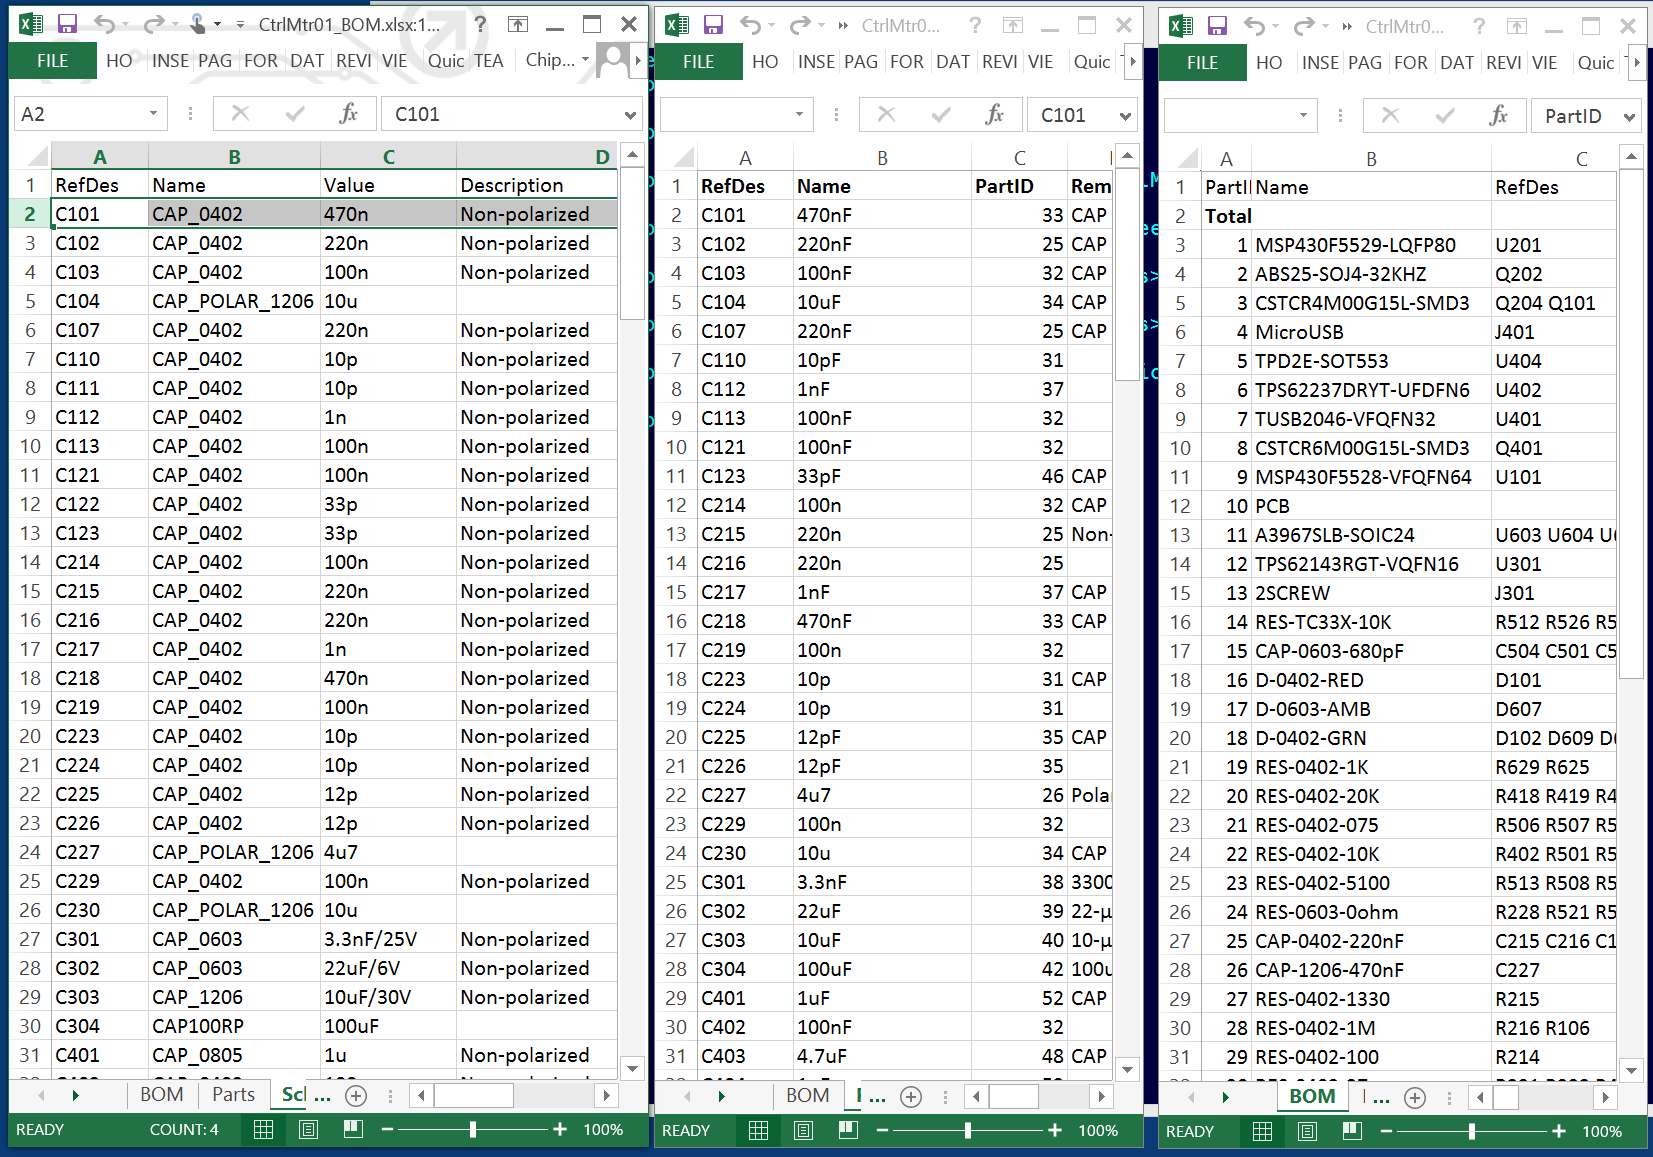
I need to verify:
Can I replace C225,C226 12pF with 10pF? No, the 10pF is a 10V cap while the 12pF needs to be 50V to handle the MTR PWR input.
I replaced R121,R122 from 220K to 240K.
R301 should be 0603, not 0402. I updated this in the schematic and layout.
R414,R415 were corrected from 27 to 20K in the BOM.
The BOM update is done. The final cost is $376.75 for the first 5 boards ($75.35 each), $30.06 per board for the first 100. I was able to stick to my target of $30!